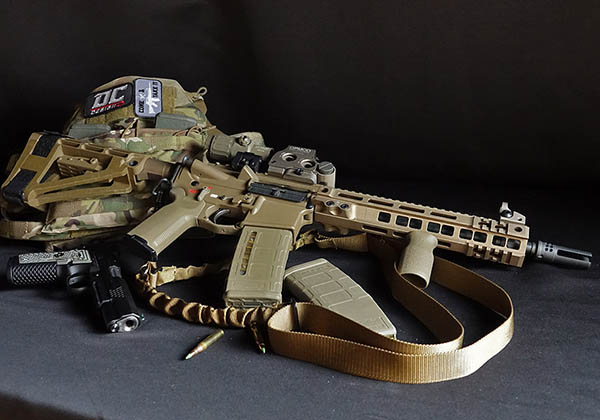
If you’re looking to build your own custom AR, you’ve come to the right place. Building a custom AR is a great way to create a firearm that perfectly suits your needs and preferences. Whether you’re a seasoned gun enthusiast or a beginner, building your own AR can be a fun and rewarding experience.
Before you get started, it’s important to understand the basic components of an AR and how they work together. The AR platform is highly modular, which means you can easily swap out parts to create a custom build. Some of the key components you’ll need to consider include the upper and lower receivers, barrel, handguard, trigger, and stock. By selecting the right parts, you can create a firearm that’s tailored to your specific shooting style and preferences.
In this basic guide, we’ll walk you through the process of building your own custom AR. We’ll cover everything from selecting the right parts to assembling your firearm and testing it at the range. Whether you’re looking to build a tactical rifle for self-defense or a precision rifle for long-range shooting, this guide will provide you with the knowledge and skills you need to get started.
Understanding AR Components
Upper Receiver
The upper receiver is the top half of the AR and houses the bolt carrier group, barrel, and charging handle. It’s where the action takes place, and it’s what makes the AR a semi-automatic rifle. The upper receiver is usually made of aluminum alloy and comes in different lengths and styles.
Lower Receiver
The lower receiver is the bottom half of the AR and is where the trigger, magazine, and stock attach. It’s also where the safety and bolt catch are located. The lower receiver is also made of aluminum alloy and comes in different styles and colors.
Barrel
The barrel is the long, cylindrical tube that the bullet travels through. It’s usually made of steel and comes in different lengths, weights, and calibers. The barrel also has rifling, which is the spiral pattern of grooves inside the barrel that helps stabilize the bullet and improve accuracy.
Trigger
The trigger is the mechanism that releases the hammer, which then strikes the firing pin and ignites the primer in the cartridge. The trigger is one of the most important components of the AR, as it determines the rifle’s accuracy and reliability.
Bolt Carrier Group
The bolt carrier group is the heart of the AR and is responsible for chambering and ejecting the cartridges. It’s made up of several parts, including the bolt, firing pin, and gas key. The bolt carrier group is also responsible for cycling the action and resetting the trigger.
Stock
The stock is the part of the AR that rests against your shoulder and provides support and stability. It’s usually made of polymer or wood and comes in different shapes and sizes. The stock also has an adjustable length of pull, which allows you to customize the fit of the rifle to your body.
Choosing the Right Components
Purpose of Build
When choosing components for your custom AR build, the first thing you need to consider is the purpose of your build. Are you building a rifle for target shooting, hunting, or self-defense? Different purposes require different components, so it’s important to have a clear idea of what you want to achieve with your build.
Budget Considerations
Your budget is another important factor to consider when choosing components for your custom AR build. You can spend as much or as little as you want on your build, but keep in mind that quality components can be expensive. Determine your budget and prioritize the components that are most important for your build.
Material and Quality
The material and quality of your components can make a big difference in the performance of your custom AR build. For example, a barrel made from high-quality steel will be more accurate and durable than a cheaper barrel made from lower-quality steel. When choosing components, look for materials and manufacturing processes that are known for their quality and durability.
Here are some common components to consider when choosing the right parts for your custom AR build:
| Component | Purpose |
|---|---|
| Barrel | Determines accuracy and range |
| Upper Receiver | Holds the barrel and other components |
| Bolt Carrier Group | Feeds rounds into the chamber |
| Lower Receiver | Holds the trigger group, magazine, and stock |
| Trigger Group | Determines trigger pull weight and feel |
| Stock | Provides stability and comfort |
| Handguard | Protects your hands from the barrel and provides mounting points for accessories |
| Sights | Determines accuracy and range |
Keep in mind that these are just a few of the many components you’ll need to consider when building your custom AR. Do your research and choose components that meet your specific needs and budget.
Assembly Process
Assembling the Lower Receiver
The lower receiver is the foundation of your AR build. It contains the trigger group, magazine well, buffer tube, and the stock. Here are the steps to assemble the lower receiver:
- Install the trigger group by inserting the hammer and trigger pins into the lower receiver.
- Attach the pistol grip to the lower receiver with the provided screw.
- Install the buffer tube by screwing it into the lower receiver.
- Attach the stock to the buffer tube using the provided screw.
Assembling the Upper Receiver
The upper receiver houses the barrel, bolt carrier group, and charging handle. Here are the steps to assemble the upper receiver:
- Attach the barrel to the upper receiver by inserting the barrel extension into the upper receiver and tightening the barrel nut.
- Install the bolt carrier group by inserting it into the upper receiver and securing it with the charging handle.
- Attach the charging handle to the upper receiver by inserting it into the charging handle slot and tightening the set screw.
Final Assembly
The final assembly involves attaching the upper receiver to the lower receiver and installing the handguard and sights. Here are the steps for the final assembly:
- Attach the upper receiver to the lower receiver by inserting the takedown and pivot pins.
- Install the handguard onto the barrel nut by sliding it onto the barrel and tightening the screws.
- Attach the sights onto the upper receiver by sliding them onto the Picatinny rail and tightening the screws.
By following these steps, you can assemble your custom AR with confidence and precision. Remember to always follow the manufacturer’s instructions and use the appropriate tools for each step.